How to Choose the Right Tech Setup for your Virtual Workshop!
Part 1 of Baking the Perfect Virtual Cake!
A culinary exploration into the world of user-privileges and accessibility, and why you should use your tools wisely…and consciously.
To put it differently: The top 6 tools combination you need to run a perfect online workshop.
A few months into the virtual everyday that is now our professional and partly also private lives….and there is always 1 question when it comes to hosting an event, doing a workshop, designing a meetup: What should we use?
By now, we have accounts basically everywhere and have run formats with different setups and requirements and goals. There is a lot to consider when you choose But the decision which tech stack you use has an effect on how conversations and interactions are shaped.
See what is on the menu!
Part 1 Basics
Chocolate Chip Cookies for Meetups
Blueberry Muffins for Ad Hoc Workshops
Marble Cake for the 90% of Virtual Workshops
Part 2 Advanced Stuff
Apple Kakka for Independent Teams Vibing
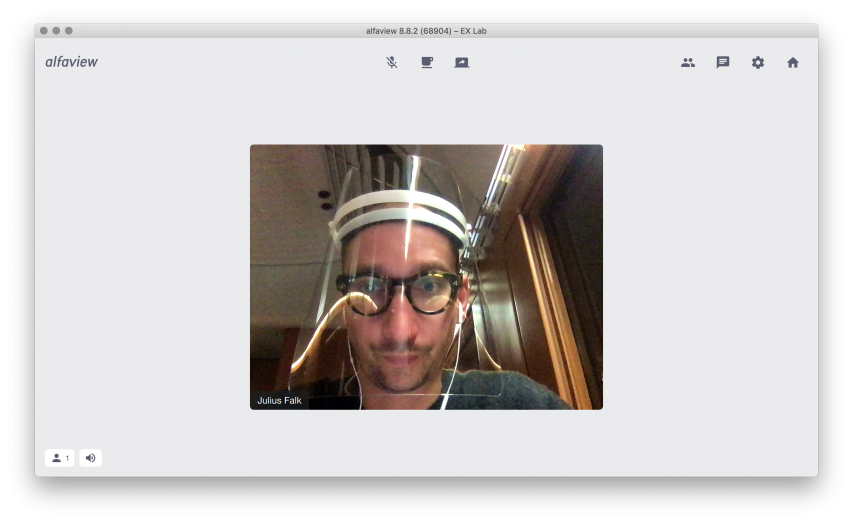
Alfaview Schwarzwälder-Kirsch Torte for Large Group Workshops
Crispy Galette with Mediterranean Veggies
A prelude, a foreword by the reflective chef..baker
I realized, the crucial features of the tools are not so much how many features they have, but how accessible they are — this includes their speed, installed base, hardware requirements — and more importantly how independent participants can use and navigate in them.
So before you setup any tools ask yourself:
- Who are the participants and what tools might they have?
- How will they be joining this session? Are they at home with a laptop? In the office with a large display? On the couch with a tablet? In the train with a phone?
- What kind of interaction do I want the participants to have? Is it 1-to-many? Is it 1-to-1? Is it many-to-many?
But why cakes?
Think about cakes! You need different cakes for different occasions! When it’s your birthday, you bake…maybe a Space Cake, but if it’s your in-laws birthday…you bake basic but solid marble cake – a trusted cake, that will work..every time. Same with virtual workshops. Some cakes are complex to make, some are more simple…but they are all delicious.
Is this the complete guide to virtual workshops?
Probably not, but it is a starting point and takes some stress off your shoulders, to try and test all this. We have done this and we made our mistakes, so you don’t have to ?
I am happy to pick up on new tools or suggestions you have, leave a comment and I will expand this article gladly with proper credit.
Let’s dive in
Chocolate Chips Cookies for Virtual Meetups
Main ingredient: Zoom
Not really a cake, but quick and easy to bake. Delicious and fast to consume. Meetups are not necessarily workshops but…we really like to engage with our Meetups participants, that means there is always an interactive part where we mingle, brainstorm or cluster pieces of information. Meetups are large and uncontrollable get-togethers with people you don’t know and have no clue how advanced their tech setup is and how familiar they are with digital tools. And that is why we use Zoom only. It’s really that easy. It has Breakouts (you need to enable that, here is how), plus you can record your session (but not the breakouts!).
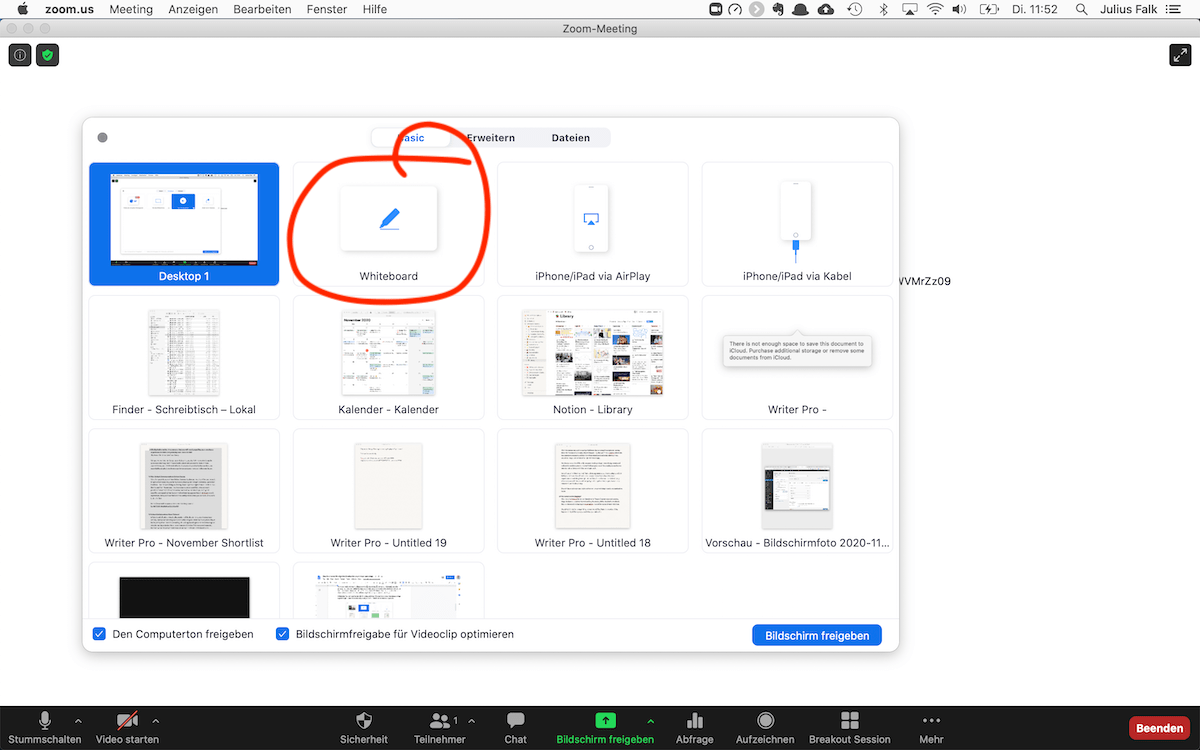
Essentially everybody has it – at least if you deal with humans from North America and Europe. We tried around with having Murals in Meetups but in our experience it is too confusing and participants often join from mobile devices. Since virtual Meetups usually take about 60 minutes you don’t have the time in the beginning to onboard everybody. There is a basic whiteboard feature actually built in in Zoom, which should be fine for collaborating & sketching out some basic things.
Why not Google Meet?
First and foremost: You probably want to record your Meetup. You may even want to broadcast to Youtube and Facebook. All that is possible with Zoom. Deep dive into the settings. Second: No breakouts!
Pro Tips
Here are some tweaks and little things I found out to be very useful.
Annotate the Shared Screen!
A little known feature is that you can also annotate your share screen with drawings and text etc — and the killer feature here is that also your participants can annotate your shared screen. It is very little used, but super powerful when collaborating without external tools. Try it out!
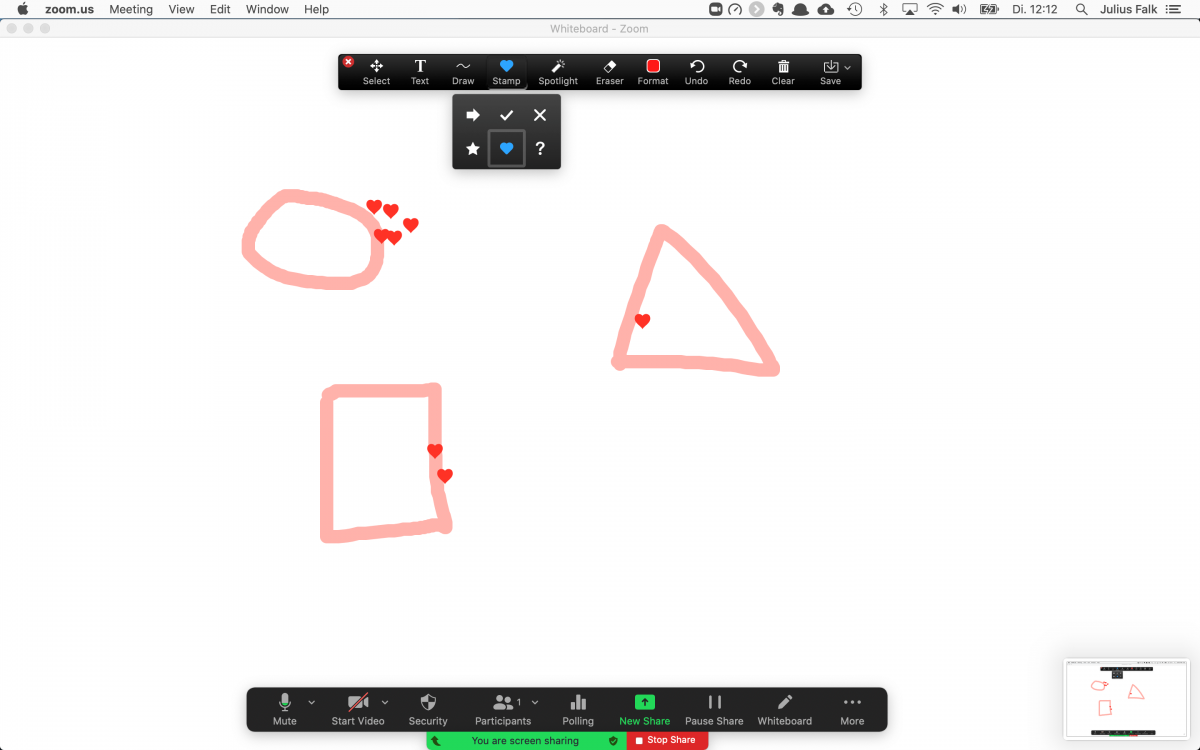
Use Stamps for Voting
You can use the stamps for voting activities. Hearts always give a good laugh — and this is basically what you want in Meetups; to connect to people.
Play some Music / Zoom DJing
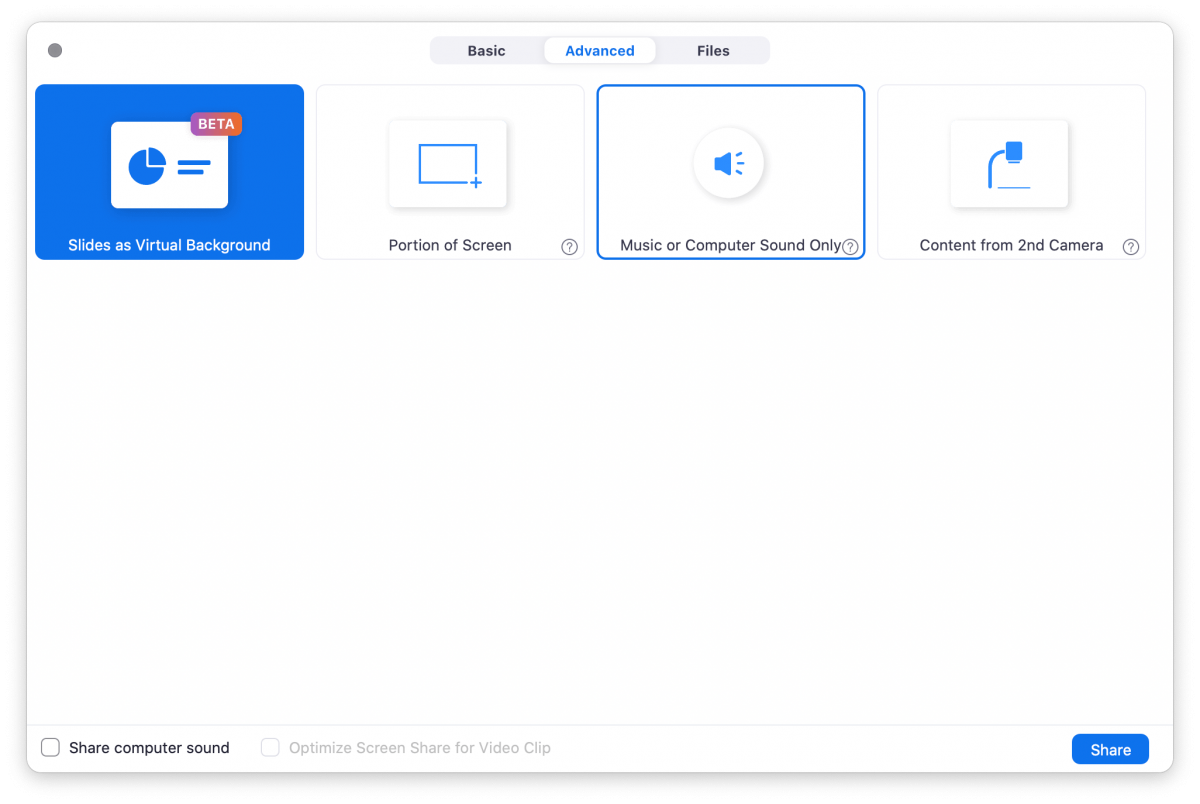
Zoom has a “Share Computer Audio” feature you can find the the “Advanced” tab of the “Share” window. Here is a good playlist on Spotify which has throbbing, jazzy beats that will give you nice head nods and creates a shared communal feeling. A little note: For brainstorming and synthesizing phase, don’t use music with lyrics, it is distracting. I learned this from Andrzej Karel, thanks!
Blueberry Muffin for Ad Hoc Workshops
Main ingredients: Google Meet & Google Jamboard
Just jump in and do! This recipe is suitable for when you want to quickly set up a workshop or a quick brainstorming session. Send the link to the Google Meet to the participants, from there you can open a Jamboard that will be shared with everyone that is in the call.

Comfort of a Page
The limit of Jamboards pages makes it easier to navigate and feels comfortable. The page in the centre of this tool feels reassuring, familiar, manageable. You don’t get lost in giant canvases. When it is full, you flip over to the next page like in a book. We always use this tool if we are looking for comfort, and quick and easy onboarding. Plus the Google Image Search feature embedded allows for super quick visualizations and fun games. It’s main benefit is that this combo is rock solid. Did I tell you our team used this in Impact Week Nepal. Mural was just stuck somewhere, no loading, laggy. We switched over to this. Our participants had power black outs and could still use Jamboards on their phone ? We are working with remote remote teams in Bolivia and have seen that this is the video tool to go to when it comes to critical bandwidth and mobile data use only. Additionally, Google Meet also offers the possibility to dial in with a phone number (if you host your meeting with a G Suite / Workplace account) The only drawback is that you can’t really have breakout rooms…yet; I saw this feature on the G-Suite roadmap, so this is more of a matter of time.
Virtual Training or a Moderated Workshop; aka the Marble Cake
Main ingredients: Zoom, Mural & Miro
The trusted standard cake, which everyone should be able to pull off. A staple in the baking repertoire which will wow friends and in-laws alike. This combination is battle tested and it’s main advantage is that it will provide a solid experience, given that participants join the workshop with a desktop kind of device — meaning no small displays that are operated by touch and a proper browse with multiple tab support.
Zoom is the way to go here. Mainly because it offers a minimized view which allows you to work in the Mural & Miro board without losing eye-contact with your participants. Check out Mary Burns, she will tell you how this works, I usually use the Mac shortcut Command + M. This seems like a minute detail, but I feel it makes a big difference, if I have conversation partners hovering in front of me instead of having to constantly move windows aside to see them.
Break Outs
Zooms best feature, apart from the rock-solid video performance and clear audio are the Break Out Spaces. And they are good, but not great. My biggest quarrel with them is that they are too host-centered, meaning that participants can not choose on their own in which breakout space they want to go, which makes casual networking, as well as impromptu brainstorming a major logistical challenge!
Update!
I learned that in an updated Version of Zoom, participants actually can join breakout rooms on their own…but, and this one is a big one: all the participants need to have that updated version of Zoom, which is a real world scenario is…well..unlikely! And if they do have that, there is still a giant UX fuckup that makes their life hard. The “join” button appears when you hover over the number of participants in the breakout group. And I am only sharing this here, because I am super proud that I actually found it after trying for 20 minutes ?
Mural & Miro
I cannot really make my mind up about which one is better. I prefer Mural for its relative simplicity, compared to Miro and that GIFs play automatically which makes it easier to design interesting and engaging boards. As a side note: Don’t go too crazy on the GIFs, they impact loading times…quite a bit!
Pro Tips!
Lock everything ?
Not an obvious task. In both Mural and Miro you can lock elements and it makes sense, that after you have set up everything to lock it in place, so nobody can move it around…and believe me, they will….by accident. But it is close to a facilitators nightmare if your whole workshop setup is now totally crooked and nobody knows where to put their ideas and thoughts anymore….and since I have been there…you need to find the person that moved the elements and then ask them to “undo”, which is not really what you want to do in a workshop, pressed by time and squeezed by expectations.
Please use the right link!
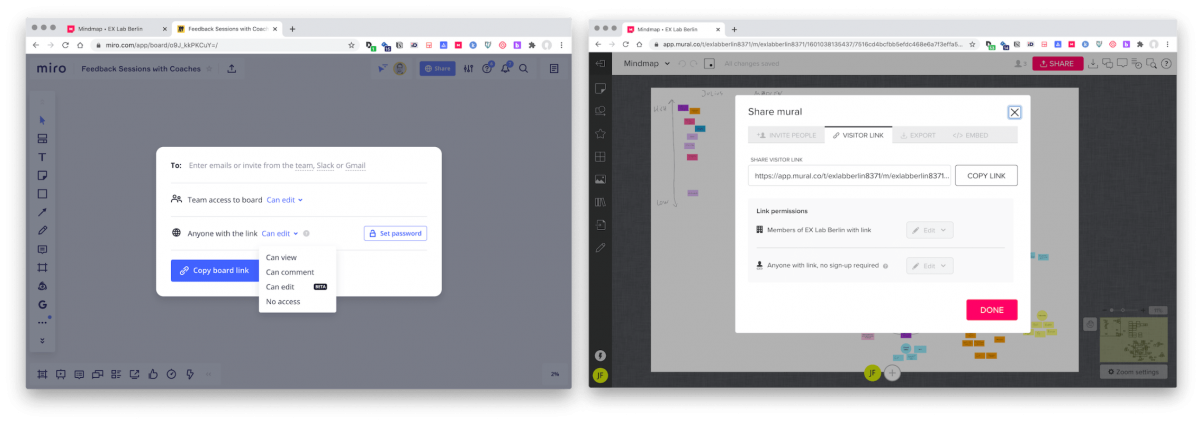
Make sure you have the right link to share in Mural, it is called Visitor Link. Do not use the invite link (which prompts people that follow it and don’t have an account to register with Mural instead of having them collaborate on your board). Same with Miro but a little less confusing; make sure you give “Anyone with a link” the rights to edit — it says “Beta” now but you shouldn’t worry, I haven’t had any issues with that…yet.
Thanks for reading. If you have feedback please leave a comment, we are curious about your opinion. Soon we will also publish part 2, the more advanced setups with more exotic tools for special circumstances that we have encountered.
I am Julius, I co-founded EX Lab, where we explore how we can create meaningful employee experiences and design workplaces of the now and the future. We focus on empowering people teams to work employee-centric and truly have the employees and their needs in mind when they build processes and activities.
